At the cape, Lisa Somerville was talking about the great SCS event that will take place this weekend in Chicago. It sounds awesome and I wish I lived a bit closer so I could attend.
If you're like me and can't actually go, at least you can participate in Sarah's contest on her blog. Check it out the prize is super cool!
Friday, March 30, 2007
Easy Baby Cards
 I decided to pack lightly when I went to my stamping cape cod retreat last weekend. Aside from all of my swaps and the supplies for my shoebox swap, I only brought some Fabriano Medioevalis folded reply cards, watercolor wonder crayons, aqua painters, the Palette Noir & Palette Burnt Umber ink pads and my bellas.
On our first night there, I borrowed Mary Jo's Bundle of Joy stamp set from the spring mini catalog and came up with these two cards. The Fabriano note cards make it so easy to make beautiful no layer cards. I simply stamped these with the Palette Burnt Umber ink pad and then water colored with my crayons. A little May Arts ribbon from Cindy Lyles store was the perfect final touch.
Now, I'll just tuck these away until my next coworker has a baby. (There's definitely something in the water at my office. We only have 65 employees, but at least 3 babies are born each year. Right now I know of one set of twins on the way.)
Don't forget to leave a comment on my Target box Tutorial post for a chance to win my blog candy!
Stamps: Bundle of Joy
Ink: Palette Hybrid Burnt Umber
Card stock: Fabriano Medioevalis Folded Reply Cards
Tools: Aquapainter, Watercolor Wonder Crayons
Accessories: May Arts Polka Dot Organdy Ribbon
Thursday, March 29, 2007
Altered Box Tutorial & Blog Candy
Supplies
 Step by Step
Step 1: Cut a piece of patterned paper to be 3.75" x 1.5". Holding vertically, score 3/16" in from each side. This will go on one side of the box.
Step 2: Cut a piece of patterned paper to be 5.5" x 1.5". Holding vertically, score 3/16" in from each side. This will go on the bottom of the box.
 Step 3: Cut a piece of patterned paper to be 3.75" x 12". Then score at 5.5" and 6 5/8". This piece will wrap from the front, around one side to cover most of the back.
Step 4: On the back of the cardstock with a pen, mark 1/2 inch in from the edge and from the first crease. Then using the paper cutter, cut down 1/2" from these two marks.
 Step 5: Flip the cardstock around and cut down from the two slits made in the previous step. This will create a 4.5" slit.
Step 6: These are the three pieces of cardstock all cut and folded.

 Step 7: Press the front of the cardstock into the snap on the front of the box to make an impression. This will be your guide as to where to punch a hole.
 Step 8: Using the dimple you just created as a guide, punch a hole with the 1/8" circle punch for the snap to fit through.
 Step 9: Apply the decoupage finish to the bottom of the box and then place the 5.5" x 1.5" piece of cardstock over the glue.

Step 10: Apply the decoupage finish to the left side of the box and then place the 3.75" x 1.5" piece of cardstock over the glue.
Step 11: Apply the decoupage finish to the the front, side and back of the box and wrap the remaining piece of cardstock over the glue.
 Step 12: Punch out a new colored tab for each divider with the Rounded Tab Punch. Then adhere a punched tab on each divider.
Step 13: Embellish with ribbon and oval punches. I purposely did not p ut a label on the white oval for this box because I think the recipient should get to choose what it says. The box holds index cards, so it would be good for receipts, recipes, and notes.
I thought this box would be great blog candy! Leave a comment to this post and I will randomly choose a winner on Monday, April 2 at 9am.
 Patterned Paper
(Petals & Paisley Double-Sided Paper)
Paper Cutter
Index Card Box from Target's Office Supply Department ($1)
Rounded Tab punch
Oval punches
1/8" Hole punch
Ribbon
Foam Paint Brush
Royal Coat Decoupage Finish (or Mod Podge)
Scrap cardstock (for tabs and ovals)
 Step by Step
Step 1: Cut a piece of patterned paper to be 3.75" x 1.5". Holding vertically, score 3/16" in from each side. This will go on one side of the box.
Step 2: Cut a piece of patterned paper to be 5.5" x 1.5". Holding vertically, score 3/16" in from each side. This will go on the bottom of the box.
 Step 3: Cut a piece of patterned paper to be 3.75" x 12". Then score at 5.5" and 6 5/8". This piece will wrap from the front, around one side to cover most of the back.
 Step 5: Flip the cardstock around and cut down from the two slits made in the previous step. This will create a 4.5" slit.
Step 6: These are the three pieces of cardstock all cut and folded.

 Step 7: Press the front of the cardstock into the snap on the front of the box to make an impression. This will be your guide as to where to punch a hole.
 Step 8: Using the dimple you just created as a guide, punch a hole with the 1/8" circle punch for the snap to fit through.
 Step 9: Apply the decoupage finish to the bottom of the box and then place the 5.5" x 1.5" piece of cardstock over the glue.


 Step 12: Punch out a new colored tab for each divider with the Rounded Tab Punch. Then adhere a punched tab on each divider.
Step 13: Embellish with ribbon and oval punches. I purposely did not p
 ut a label on the white oval for this box because I think the recipient should get to choose what it says. The box holds index cards, so it would be good for receipts, recipes, and notes.
I thought this box would be great blog candy! Leave a comment to this post and I will randomly choose a winner on Monday, April 2 at 9am.
Wednesday, March 28, 2007
Challenge Card

At our cape cod stamping weekend, Pat issued a limited supply challenge a la splitcoast stampers. The challenge was to make a card with only Green Galore, Rose Red, Regal Rose, Whisper White & Basic Black card stock. We were also limited to the following stamp sets: You Make Me Happy, Happy Everything, Polka Dots & Petals and the following backgrounds Paisley, Aida Cloth & Print Pattern.
I chose to use You Make Me Happy since I don't own that set at home. Kim brought some page maps, which provided the layout for my card. I'm not sure which month it was though, but I can tell that I will be a page map junkie really soon! The large daisy was cut out and then popped up with a Stampin' Dimensional.
If I was at home, I would have used my Stamp-a-majig to place the centers on the flowers. You can see that I missed on one of them when I tried to eyeball it. But, it was a fun challenge and I am happy with the result.
This is a super cute stamp set! I love all of the texture that comes molded right into each stamp. So thanks for the challenge Pat!
Stamps: You Make Me Happy, Aida Cloth
Ink: Regal Rose, Basic Black, Green Galore, Rose Red
Card stock: Regal Rose, Whisper White, Green Galore, Basic Black
Tools: Small Corner Rounder, Paper Snips, Dimensional
Tuesday, March 27, 2007
Walking
I will be participating in the Rhode Island Chapter's 18th Annual MS Walk with my family on Sunday, April 22nd 2007. If you would like to help out with a donation, or join my team and walk with us, follow this link.
My step-sister, Jessica, was diagnosed with MS a couple of years ago. She just turned 30 years old.
The National Multiple Sclerosis Society is dedicated to ending the devastating effects of MS. Any amount, great or small, helps to make a difference in the lives of people with MS. I appreciate your support and look forward to letting you know how I do with a hand stamped card! Pictures to come. Still waiting for my second bella order to arrive. If you do donate, please send me an email with your snail mail address so I can mail you a thank you card! Click on email me at the left.
P.S. If you would like more information about the National Multiple Sclerosis Society, how proceeds from the MS Walk are used, or the other ways you can get involved in the fight against MS, please visit nationalmssociety.org.
My step-sister, Jessica, was diagnosed with MS a couple of years ago. She just turned 30 years old.
The National Multiple Sclerosis Society is dedicated to ending the devastating effects of MS. Any amount, great or small, helps to make a difference in the lives of people with MS. I appreciate your support and look forward to letting you know how I do with a hand stamped card! Pictures to come. Still waiting for my second bella order to arrive. If you do donate, please send me an email with your snail mail address so I can mail you a thank you card! Click on email me at the left.
P.S. If you would like more information about the National Multiple Sclerosis Society, how proceeds from the MS Walk are used, or the other ways you can get involved in the fight against MS, please visit nationalmssociety.org.
Monday, March 26, 2007
Receipts Box
Wow! I just got home from a fabulous 4-day weekend spent stamping with 18 of my closest friends. :) We swapped, ate, shoebox swapped, ate, stamped, ate, laughed, ate -- you get the picture!
I shared most of my swaps for this trip last week, but I saved my 3-d swap for last. Here's the before picture:

And the after picture:

I got this idea from my fellow Connecticut stamper, Cathy. The little boxes were $1 each at target in the office supply section. I adhered the designer paper to the boxes with Royal Coat Decoupage Finish. It's like Mod Podge. I thought it would be cute to keep in my car or purse to organize business receipts until I had a chance to file them at home. The word Receipts was printed in the SU Harry Paul font from one of the font cds. Then I used the two oval punches to punch out the word and its layer. I finished them off with a little ribbon, just like Cathy did.
For the inside, I used the new Stampin' Up! rounded tab punch from the Spring Mini Catalog to cover the original tabs and make things a little more colorful.
I'll try to put a tutorial together with all the measurements this week. Be a little patient with me though! I'm really tired from my crazy stamping weekend and I have a pile of laundry to get through!
Here's a bunch of close-ups. Click on the pictures to see a larger view.


I shared most of my swaps for this trip last week, but I saved my 3-d swap for last. Here's the before picture:

And the after picture:

I got this idea from my fellow Connecticut stamper, Cathy. The little boxes were $1 each at target in the office supply section. I adhered the designer paper to the boxes with Royal Coat Decoupage Finish. It's like Mod Podge. I thought it would be cute to keep in my car or purse to organize business receipts until I had a chance to file them at home. The word Receipts was printed in the SU Harry Paul font from one of the font cds. Then I used the two oval punches to punch out the word and its layer. I finished them off with a little ribbon, just like Cathy did.
For the inside, I used the new Stampin' Up! rounded tab punch from the Spring Mini Catalog to cover the original tabs and make things a little more colorful.
I'll try to put a tutorial together with all the measurements this week. Be a little patient with me though! I'm really tired from my crazy stamping weekend and I have a pile of laundry to get through!
Here's a bunch of close-ups. Click on the pictures to see a larger view.


Friday, March 23, 2007
Bunny Latch
 This is my shoebox swap card for the SSUS Cape Cod retreat this weekend. I was totally inspired by one of my stamp club friends, Hannah. She made the cutest big buckle card using the bunny hugs stamp set that night!
For a step-by-step tutorial, check out Big Buckle Card on splitcoast stampers.
Stamps: Bunny Hugs, Canvas
Ink: Regal Rose, Tempting Turquoise, Stazon Jet Black, Pretty in Pink Marker
Card stock: Pretty in Pink, Tempting Turquoise, Certainly Celery, Petals & Paisley designer paper
Tools: Paper Cutter, Bone Folder, Word Window Punch, Small Corner Rounder

Wednesday, March 21, 2007
Shop-a-bella?

I got my first order of the bellas in last week and I couldn't wait to play with them! I decided that for this card, less is more. So I dug out my beautiful Fabriano Medioevalis folded cards & envelopes that I bought from Cindy's store a while back.
I stamped emmybella with a Palette Noir Black ink pad. I bought mine from a TAC demonstrator, but you can also get them at Ellen's store. I wanted to watercolor and was worried that StazOn wouldn't be dark enough on this very textured paper. The Palette ink pad worked perfectly.
I water colored Emmy with my watercolor wonder crayons and an aquapainter. The sentiment is from Inky Antics. The ribbon was the final touch (fake cindy ribbon from Michael's.)
Tuesday, March 20, 2007
Paisley Purse

After making the colorful purses yesterday, I decided to make a Vera Bradley knock-off. The paisley stamp in Polka Dots & Paisley is just perfect for this! It's really hard to see in the picture, but I stamped the little flower from Polka Dots & Petals in white craft ink in between the paisleys.
Once again, the card was made following Julie Ebersole's awesome purse template. You need to be a Stampin' Up! demonstrator to access Julie's pattern. If you aren't a demonstrator, ask your demonstrator to show you how to make it.
Stamps: Polka Dots & Petals, Polka Dots & Paisley, Alphadots
Ink: Gable Green Classic, Pink Passion Craft Ink, Whisper White Craft Ink
Card stock: Gable Green, Pink Passion
Accessories: White Grosgrain, Crystal Effects
Tools: Paper Piercer, 1/8" circle hole punch, 3/4" circle punch, Coluzzle, Signo White Gel Pen


Monday, March 19, 2007
Designer Purse

It's all Debbie Olson's fault really. I didn't originally order Polka Dots & Petals from the Spring Mini catalog because I thought I didn't really need another circle stamp set. But, when I saw this cute card by Debbie I just had to have it. Combine Debbie's card, the last week's color challenge and Julie Ebersole's awesome purse template and you get something like this.
You need to be a Stampin' Up! demonstrator to access Julie's pattern. If you aren't a demonstrator, ask your demonstrator to show you how to make it.
I was inspired by the colorful purses that seem to be in style now by Dooney & Bourke, Louis Vuitton and Coach. I figure if you can't own a $1000 purse, you can at least make colorful purse cards!
The monogram has been covered in crystal effects to make it look more like an insignia. Inside is "Happy Birthday" from cheery chat. This would be especially cute with a gift card inside.
Stamps: Polka Dots & Petals, Alphadots
Ink: Elegant Eggplant, Certainly Celery, Cool Carri bean
Card stock: Whisper White, Elegant Eggplant
Accessories: Celery Grosgrain, Crystal Effects
Tools: Paper Piercer, 1/8" circle hole punch, 3/4" circle punch, Coluzzle, Signo White Gel Pen
Color Combo Challenge 103
Saturday, March 17, 2007
Sparkly Doodles
It has been a while since I've pulled out the Pearl Ex. I love the look, but I don't always feel like cleaning up the shimmery mess that results in my stamp room.
 But, I am going to be swapping with a very special group of stampers next weekend and I figured if they weren't worth it, then who is? So, I started by stamping the smaller doodle randomly in VersaMark ink all over my regal rose card stock. Then I dabbed my paint brush in the Flamingo Pink Pearl Ex and little tapped it all over the stamped doodles. For a great tutorial check out Poppin' Pearls on splitcoast stampers.
After I had my shimmering background, I decided to use this week's sketch challenge to finish off my card. I don't think I've ever done a sketch challenge on time, so this is great progress! This is sketch 115.
Of course, the card is much more sparkly in person. The scanner doesn't really pick up on it at all.
Stamps: Doodle This, All Year Cheer II
Ink: VersaMark, Regal Rose, So Saffron, Palette Noir Black
Card stock: Shimmery White, Regal Rose, Basic Black
Accessories: Pop-up glue dot, Pearl Ex Assortment III
Tools: Round Tab Punch, Aquapainter, Stapler, Paint Brush
 But, I am going to be swapping with a very special group of stampers next weekend and I figured if they weren't worth it, then who is? So, I started by stamping the smaller doodle randomly in VersaMark ink all over my regal rose card stock. Then I dabbed my paint brush in the Flamingo Pink Pearl Ex and little tapped it all over the stamped doodles. For a great tutorial check out Poppin' Pearls on splitcoast stampers.
After I had my shimmering background, I decided to use this week's sketch challenge to finish off my card. I don't think I've ever done a sketch challenge on time, so this is great progress! This is sketch 115.
Of course, the card is much more sparkly in person. The scanner doesn't really pick up on it at all.
Stamps: Doodle This, All Year Cheer II
Ink: VersaMark, Regal Rose, So Saffron, Palette Noir Black
Card stock: Shimmery White, Regal Rose, Basic Black
Accessories: Pop-up glue dot, Pearl Ex Assortment III
Tools: Round Tab Punch, Aquapainter, Stapler, Paint Brush
Wednesday, February 21, 2007
Email Subscription!
Lisa C. suggested that I add an email subscription to my blog so I did! Just look to the left and enter your email address. Then whenever I post something new, you'll get an email to let you know. Pretty cool, huh?
I hadn't really thought about adding an email subscription before because I use Google Reader to keep track of all of the blogs that I read. If you don't currently have a blog management system, I would recommend the Google Reader. It's free and super easy to use. Just create an account and then click on Add Subscription to add a new blog. You can even create folders to organize your blogs. For example, I have a Stamping folder, a Knitting folder and a Family folder. So now, if I want to see if anyone posted something new, I can just log into the Google Reader and see all the new posts. I don't have to stalk all of my favorite blogs anymore. Quite a time saver!
I hadn't really thought about adding an email subscription before because I use Google Reader to keep track of all of the blogs that I read. If you don't currently have a blog management system, I would recommend the Google Reader. It's free and super easy to use. Just create an account and then click on Add Subscription to add a new blog. You can even create folders to organize your blogs. For example, I have a Stamping folder, a Knitting folder and a Family folder. So now, if I want to see if anyone posted something new, I can just log into the Google Reader and see all the new posts. I don't have to stalk all of my favorite blogs anymore. Quite a time saver!
Tuesday, February 20, 2007
Snappy Birthday

Phew! I finished my spring mini Control Freaks swaps just under the wire this quarter. But they are now safely on their way to Nebraska where they will meet the other 42 wonderful swapper's cards before making their trip back to me in Connecticut.
The layout of this card is from sketch challenge 54. It's an oldie but a goodie. To create the sand dune, I used the rotary blade in the cutter kit. I've used the distressor tool a lot before, but this was my first experience with the rotary blade. Let me tell you, it was super easy and I had to make 42 of these. :)
To give it a little more sandy look, I used a sahara sand marker in the color spritzer tool. Once again, so easy, but I love the look.
Finally I stamped Mr. Crab on whisper white card stock with basic black classic ink. I also created a mask for him so that I could stamp the party hat and make it look like it was sitting on his head with his beady little eyes sticking out front. When it came time to color Mr. Crab in, I watercolored with Really Rust. It was just the right mix of red and orange!
Stamps: Crab & Company
Ink: Basic Black, Really Rust, Cool Caribbean, Old Olive, Sahara Sand
Card stock: Whisper White, Old Olive, Cool Caribbean, Sahara Sand, Basic Black
Accessories: Black Grosgrain Ribbon
Tools: Color Spritzer Tool, Cutter Kit, Aquapainter
Thursday, January 25, 2007
Love Ewe
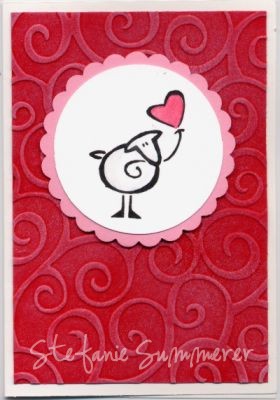 I've been really busy with workshops and classes due to Stampin' Up's Sell-a-Bration, so I haven't had as much time to stamp as I normally do. Last night after I finished prepping for another class, I decided to kick back and play with some new supplies that have made their way into my stamp room since Christmas.
This cute little sheep is the hearty ewe stamp from Stamping Bella. Ever since I started knitting, I've developed a new appreciation for sheep and this little guy was too cute! I used my Watercolor Wonder Crayons from Stampin' Up! to color him in.
The white circle was cut with my colluzle and then I used the Marvy mega scalloped circle punch for the pink circle underneath.
The background was embossed with the Divine Swirl embossing folder in my cuttlebug. Then I brushed some whisper white craft ink over the swirls to highlight them a little.
Stamps: Hearty Ewe Stamping Bella
Ink: Stazon Jet Black, Whisper White Craft Ink
Card stock: Whisper White Small Notes & Envelopes, Whisper White, Real Red, Pretty in Pink
Accessories: Stampin' Dimensionals
Tools: Watercolor Wonder Crayons, Colluzle Companion Circle template, Divine Swirl Embossing Folder, Mega Scalloped Circle Punch
Thursday, January 18, 2007
Love Bug
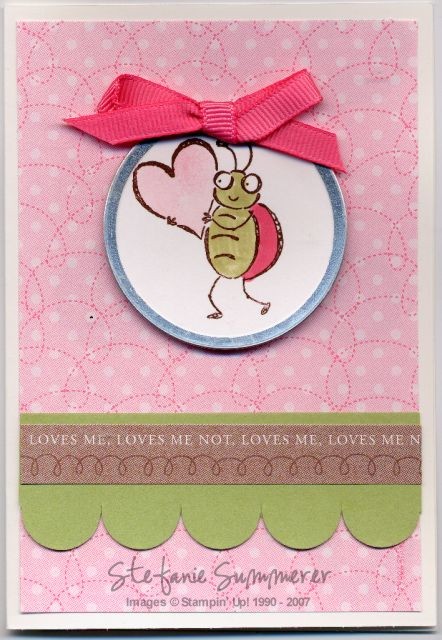 Considering I didn't have a vision in mind for this card, I really love how it turned out. I started with the Note Cards & Small Envelopes from Stampin' Up! These note cards are smaller than the typical 5 1/2" x 4 1/4" card that we normally make. I believe they measure 3 1/2 " x 5".
I also had a bunch of circle aluminium metal edge tags in the larger size left over after making a bunch of these Christmas cards for a swap.
So, I put it all together with some of the Loves Me double-sided Designer paper from the Winter Mini catalog and voila!
Stamps: Olive You
Ink: Stazon Timber Brown, Regal Rose, Certainly Celery & Pretty in Pink Markers
Card stock: Whisper White Small Notes & Envelopes, Certainly Celery, Loves Me Designer paper.
Accessories: Circle Aluminum Metal Edge tags, Rose Grosgrain Ribbon
Tools: Slit Punch, Stampin' Dimensionals
Wednesday, January 17, 2007
Valentine's Treats

Sour cream containers are so fun and easy to make! Courtney has a great tutorial here on her blog.
I must be an odd ball though because I roll mine in the other direction. That makes my containers longer and not as cute. I'll have to try it the other way soon. The only other thing I'll add to Courtney's excellent tutorial is that I crimp the two ends of the container with my Crimper tool. It just adds that little extra finishing touch.
Anyway, I started making them out of vellum card stock after seeing Kelly's cute Halloween treat container on splitcoast stampers. I used Real Red and Basic Black Classic Ink and set them aside to dry for a couple of hours. When I came back they were still wet, so I had to give them a shot with my heat gun. I was planning to make these at a workshop, but I didn't want to bring my heat gun along.

So, I decided to try again with Kraft card stock and whisper white. Which do you like better?
Stamps: So Very, Good Things Simply Sent Kit
Ink: Real Red, Basic Black
Card stock: Vellum Card stock, Whisper White, Kraft
Accessories: Sticky Strip
Tools: Crimper
Tuesday, January 16, 2007
Awning Pocket Note
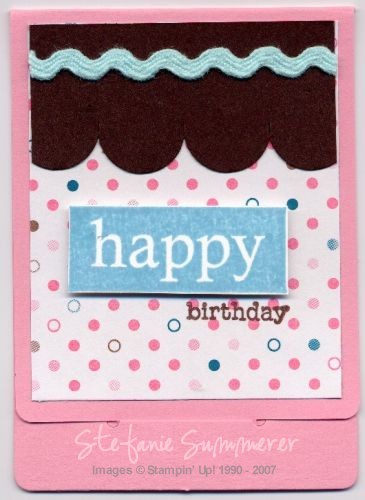
I'm in love with all of the scalloped borders that are so in style right now. Before the holidays I bought several of the Marvy Uchida scalloped punches, but I haven't used them yet. Instead, I've been flipping my Stampin' Up! Slit Punch upside down to make a cute scalloped border. This is all the rage right now on splitcoast stampers, but in case you haven't tried it, here's the quick directions. Hold the punch upside down so you can see where it's going to punch. Then punch across in a straight line so that each slit starts right after the previous one ended. When you've done the entire piece of card stock, the two halves will separate and you'll be left with a scalloped border and a reverse scalloped border. Pretty neat, huh?
In this card, I thought the scalloped border with the Caribbean Cool ric rac looked like an awning to a cute candy shop.
I'm also loving the Loves Me Designer Paper and Flirty Ribbon Originals from the Winter Mini Catalog. They coordinate so well together and the colors are so bright and happy!
Stamps: So Very, Everyday Flexible Phrases
Ink: Taken with Teal, Chocolate Chip
Card stock: Chocolate Chip, Pretty in Pink Pocket Notes, Loves Me Designer Paper
Accessories: Flirty Ribbon Originals
Tools: Paper Snips, Stampin' Dimensionals, Slit Punch
Monday, January 15, 2007
Oh Baby!
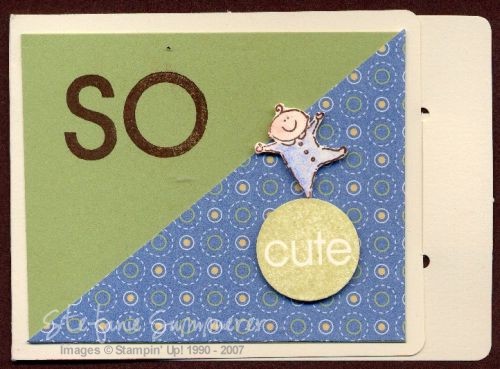
Now that I've pulled out the Pocket Notes from the Winter Mini catalog, I can't stop using them. These little cuties will not be in the Spring Mini catalog so if you like them, you'll want to order them before the end of February.
This card was super easy to make, but it cracks me up. I wanted it to look like the little baby was balancing on the cute ball. I think it came out perfectly.
I only inked the "so" from the So Very Sell-a-Bration set because the whole thing wouldn't fit on my tiny pocket card. The cute ball and baby are popped up with Stampin' Dimensionals.
Stamps: Tag Time, So Very
Ink: Stazon Timber Brown
Card stock: Very Vanilla, Certainly Celery, Very Vanilla Pocket Notes, Sarah Designer Paper
Tools: Paper Snips, Stampin' Dimensionals, Aquapainter, Watercolor Wonder Crayons (Ballet Blue & Blush Blossom)
Sunday, January 14, 2007
Quick Notes
 Yesterday I decided to pull out the pocket notes that I ordered from the Winter Mini Catalog during the preorder period. I guess I just never got around to trying them out before.
This little card was inspired by a swap I received from Lisa Martz. I loved her idea to mount the pocket note onto a full size card. On her card, if you opened the little note, you'd see a secret message.
However, I wanted to keep it simple with these little cards. I think they'd be great for a last minute kids birthday where you don't have a whole lot of time to pull a bigger card together.
Stamps: Cheery Chat, Big Pieces
Ink: Regal Rose, Cool Caribbean, Taken with Teal, Chocolate Chip
Card stock: Whisper White, Taken with Teal, Chocolate Chip Pocket Notes
Accessories: Flirty Ribbon Originals
Tools: Stapler
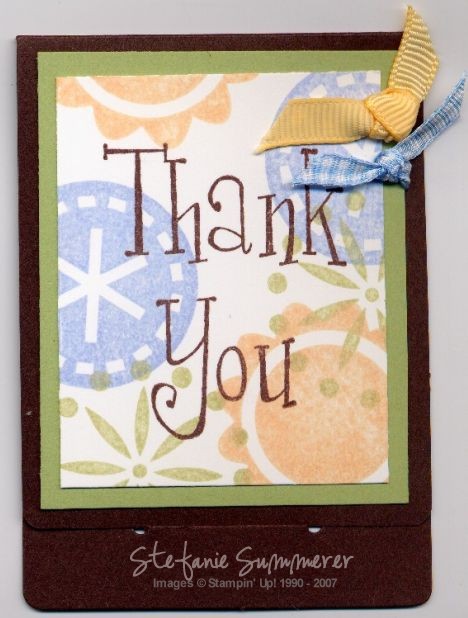
They make cute Thank you notes too. :) In fact, all of the sayings from Cheery Chat fit perfectly on these cute little cards.
Stamps: Cheery Chat, Big Pieces
Ink: Apricot Appeal, Bashful Blue, Certainly Celery, Chocolate Chip
Card stock: Whisper White, Certainly Celery, Chocolate Chip Pocket Notes
Accessories: Apricot Grosgrain Ribbon, Light Blue Gingham Ribbon
Tools: Double Circle Punch
Tuesday, January 09, 2007
Peer Pressure
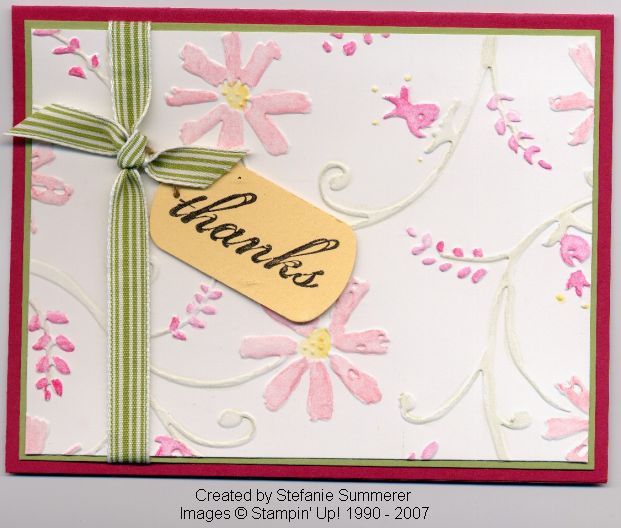
What can I say? I succumbed to peer pressure and am now the happy owner of a super cute little Cuttlebug. The embossing dies sent me right over the edge. I picked up my little green cutie at my local Joann's with a 50% off coupon -- not too shabby!
To make this card, I used the Stylized Flower embossing folder on Whisper White card stock. The machine runs smooth like butter! My only problem is that the screw that holds the handle onto the machine is defective. So until I can call Provo Craft to have it replaced, I am cranking it very carefully. As you can see, it's not slowing me down too much. :)
To color the embossed flowers I used my Aquapainters and Watercolor Wonder Crayons. The colors I used: Cameo Coral, Rose Red, Certainly Celery & Barely Banana are from one of the color combinations on the Color Coach. This is a great tool that really helps you think outside of your normal colored box.
Stamps: Much Appreciated
Ink: Basic Black
Card stock: Whisper White, Certainly Celery, Rose Red
Accessories: Linen Thread, Celery striped ribbon from May Arts
Tools: Label Punch, Watercolor Wonder Crayons, Aquapainter
Subscribe to:
Posts (Atom)




