Showing posts with label Winter Mini 2007. Show all posts

Monday, April 02, 2007

Earthy Flowers

At my cape cod stamping weekend, I stamped a bunch of bellas on some Fabriano Medioevalis reply note cards. I got inky fingerprints on some of them, so I cut them down to layer onto a regular card. I water colored flowahbella with my watercolor wonder crayons and an aqua painter. Then when she dried, I added some glitter highlights with Maria's Stardust Gelly Roll pen which you can get from Cindy Lyles' eBay store. I also colored in her mouth with my white glaze pen gelly roll pen.

I CASEd the layout of this card from Candy Williams. I've been saving this card of Candy's for a while just waiting for the perfect image to come along. I thought flowahbella fit the bill nicely.

This card also helps fulfill a challenge issued after our cape cod weekend because I used something that I purchased that weekend -- the EK Success photo corner punch. I know, I know. I could have just made the photo corner with my square punches or with my tag punch. But you know what? This was so much easier! And I actually have a photo corner on the card. Even though I've known how to make photo corners with my square punches since convention last July, I haven't actually done it yet. So if the corner punch makes it more convenient, then let me be. I'm thrilled with the result. ;)

Stamps: Flowahbella, Fancy Flexible Phrases
Ink: Palette Hybrid Noir Black
Card stock: Not Quite Navy, Old Olive, Fabriano Medioevalis scraps
Tools: Cuttlebug Bloom Dots Embossing Folder, Word Window Punch, Photo Corner Punch, White Glaze Gelly Roll Pen, Stardust Clear Gelly Roll Pen, Watercolor Wonder Crayons, Aqua painter

Thursday, January 18, 2007

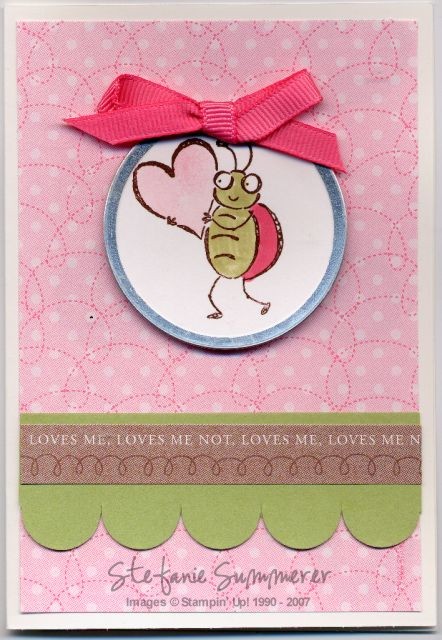
Love Bug

Considering I didn't have a vision in mind for this card, I really love how it turned out. I started with the Note Cards & Small Envelopes from Stampin' Up! These note cards are smaller than the typical 5 1/2" x 4 1/4" card that we normally make. I believe they measure 3 1/2 " x 5".

I also had a bunch of circle aluminium metal edge tags in the larger size left over after making a bunch of these Christmas cards for a swap.

So, I put it all together with some of the Loves Me double-sided Designer paper from the Winter Mini catalog and voila!

Stamps: Olive You
Ink: Stazon Timber Brown, Regal Rose, Certainly Celery & Pretty in Pink Markers
Card stock: Whisper White Small Notes & Envelopes, Certainly Celery, Loves Me Designer paper.
Accessories: Circle Aluminum Metal Edge tags, Rose Grosgrain Ribbon
Tools: Slit Punch, Stampin' Dimensionals

Wednesday, January 17, 2007

Valentine's Treats


Sour cream containers are so fun and easy to make! Courtney has a great tutorial here on her blog.

I must be an odd ball though because I roll mine in the other direction. That makes my containers longer and not as cute. I'll have to try it the other way soon. The only other thing I'll add to Courtney's excellent tutorial is that I crimp the two ends of the container with my Crimper tool. It just adds that little extra finishing touch.

Anyway, I started making them out of vellum card stock after seeing Kelly's cute Halloween treat container on splitcoast stampers. I used Real Red and Basic Black Classic Ink and set them aside to dry for a couple of hours. When I came back they were still wet, so I had to give them a shot with my heat gun. I was planning to make these at a workshop, but I didn't want to bring my heat gun along.

So, I decided to try again with Kraft card stock and whisper white. Which do you like better?

Stamps: So Very, Good Things Simply Sent Kit
Ink: Real Red, Basic Black
Card stock: Vellum Card stock, Whisper White, Kraft
Accessories: Sticky Strip
Tools:
Crimper

Tuesday, January 16, 2007

Awning Pocket Note


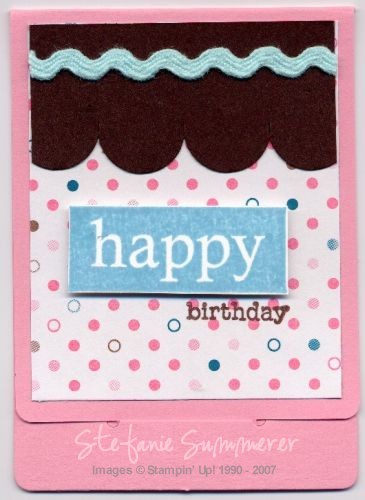
I'm in love with all of the scalloped borders that are so in style right now. Before the holidays I bought several of the Marvy Uchida scalloped punches, but I haven't used them yet. Instead, I've been flipping my Stampin' Up! Slit Punch upside down to make a cute scalloped border. This is all the rage right now on splitcoast stampers, but in case you haven't tried it, here's the quick directions. Hold the punch upside down so you can see where it's going to punch. Then punch across in a straight line so that each slit starts right after the previous one ended. When you've done the entire piece of card stock, the two halves will separate and you'll be left with a scalloped border and a reverse scalloped border. Pretty neat, huh?

In this card, I thought the scalloped border with the Caribbean Cool ric rac looked like an awning to a cute candy shop.

I'm also loving the Loves Me Designer Paper and Flirty Ribbon Originals from the Winter Mini Catalog. They coordinate so well together and the colors are so bright and happy!

Stamps: So Very, Everyday Flexible Phrases
Ink: Taken with Teal, Chocolate Chip
Card stock: Chocolate Chip, Pretty in Pink Pocket Notes, Loves Me Designer Paper
Accessories: Flirty Ribbon Originals
Tools: Paper Snips, Stampin' Dimensionals, Slit Punch

Monday, January 15, 2007

Oh Baby!


Now that I've pulled out the Pocket Notes from the Winter Mini catalog, I can't stop using them. These little cuties will not be in the Spring Mini catalog so if you like them, you'll want to order them before the end of February.

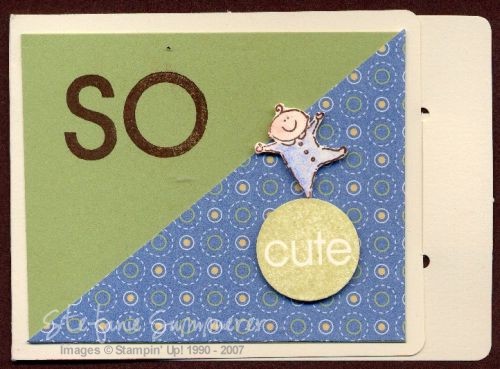
This card was super easy to make, but it cracks me up. I wanted it to look like the little baby was balancing on the cute ball. I think it came out perfectly.

I only inked the "so" from the So Very Sell-a-Bration set because the whole thing wouldn't fit on my tiny pocket card. The cute ball and baby are popped up with Stampin' Dimensionals.

Stamps: Tag Time, So Very
Ink: Stazon Timber Brown
Card stock: Very Vanilla, Certainly Celery, Very Vanilla Pocket Notes, Sarah Designer Paper
Tools: Paper Snips, Stampin' Dimensionals, Aquapainter, Watercolor Wonder Crayons (Ballet Blue & Blush Blossom)

Sunday, January 14, 2007

Quick Notes

Yesterday I decided to pull out the pocket notes that I ordered from the Winter Mini Catalog during the preorder period. I guess I just never got around to trying them out before.

This little card was inspired by a swap I received from Lisa Martz. I loved her idea to mount the pocket note onto a full size card. On her card, if you opened the little note, you'd see a secret message.

However, I wanted to keep it simple with these little cards. I think they'd be great for a last minute kids birthday where you don't have a whole lot of time to pull a bigger card together.

Stamps: Cheery Chat, Big Pieces
Ink: Regal Rose, Cool Caribbean, Taken with Teal, Chocolate Chip
Card stock: Whisper White, Taken with Teal, Chocolate Chip Pocket Notes
Accessories: Flirty Ribbon Originals

Tools: Stapler

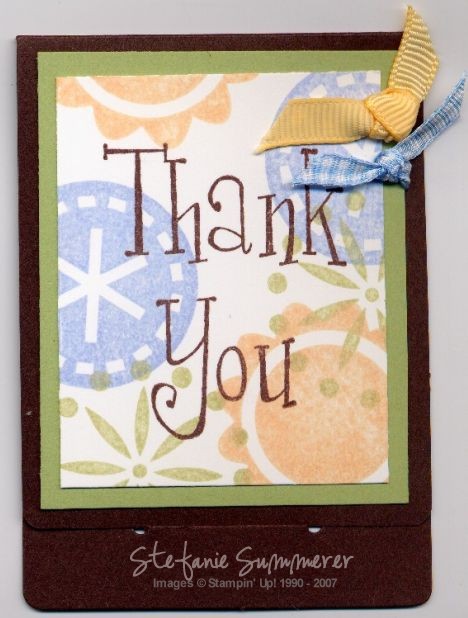
They make cute Thank you notes too. :) In fact, all of the sayings from Cheery Chat fit perfectly on these cute little cards.


Stamps: Cheery Chat, Big Pieces
Ink: Apricot Appeal, Bashful Blue, Certainly Celery, Chocolate Chip
Card stock: Whisper White, Certainly Celery, Chocolate Chip Pocket Notes
Accessories: Apricot Grosgrain Ribbon, Light Blue Gingham Ribbon
Tools: Double Circle Punch

Monday, December 11, 2006

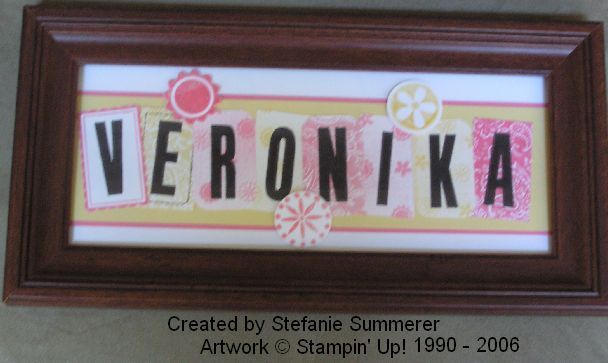
Veronika


I made this frame for my co-worker's daughter. They are Russian, so the spelling of her name is a little different. That's the great thing about making name frames. Anything goes! It would probably be really hard to find something with her name on it in this country.

I just love the new Big Things stamp set from the winter mini catalog. It coordinates so well with Little Things from the Idea Book & Catalog.

The frame is from Wal-Mart. I used craft ink for everything so it won't fade over time. And for a little extra glitz, I embossed the big things with iridescent ice embossing powder. When I was all done, I thought the E was blending in a little too much, so I used the paper piercer to punch holes all around the edges and then connected them with a black Stampin' Write Journaler to make it look hand stitched.

If you're in my neck of the woods, check out my name frame class in February. I'll do all the cutting and shopping and all you have to do is stamp. The frame is included in my class fee.

Stamps: Headline Alphabet, Big Pieces, Little Things, Label Classics, Paisley, Linen, Canvas
Ink: Basic Black, Pretty in Pink, Barely Banana, Regal Rose (all Craft ink)
Cardstock: Whisper White,
Barely Banana, Regal Rose
Accessories: Iridescent Ice Embossing Powder, Basic Black Stampin' Write Journaler
Tools: Crafter's Toolkit, Snail Adhesive, Heat Tool, Powder Pal

Thursday, November 30, 2006

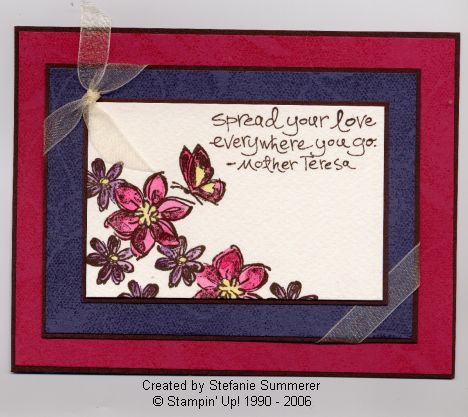
Odd Combination


This card didn't turn out the way I was planning at all! In my head, it was pretty in pink and barely banana -- kind of soft and flowy. Somewhere along the way though, it took a surprising turn to rose red and vintage violet -- much more elegant than I envisioned. I'm not really sure where the colors came from. I just pulled them out and gave it a shot. After all, it's just paper right?

The layout is from sketch challenge 84 at splitcoast stampers. I especially loved the way that Trudee used organdy ribbon in her Marigold Petals card here.

This card features another way to use watercolor wonder crayons with watercolor paper. Instead of using the direct to rubber technique that I used for this card, I stamped the flowers and butterfly with Timber Brown Stazon ink on the watercolor paper. Then with my aquapainter, I picked up color from the bottom of my crayons and colored in the images. By using watercolor paper, I had more time to blend colors than I would have with cardstock.

Finally I stamped both the vintage violet and rose red layers with the Fine Lace background stamp to soften the layers.

Stamps: Butterfly of Happiness, Fine Lace Background Stamp
Ink: Rose Red, Vintage Violet, Timber Brown Stazon
Cardstock:
Rose Red, Vintage Violet, Chocolate Chip, Watercolor Paper
Accessories: Ivory Narrow Organdy Ribbon, Watercolor Wonder Crayons (Regal Rose, Elegant Eggplant, So Saffron), Snail Adhesive, Aquapainter

Tuesday, November 28, 2006

Sweet Thanks

I am loving the new Loves Me paper in the winter mini. The colors are so me. This card is super simple to make, but uses a bunch of punches.

First I stamped the thank you flower on whisper white cardstock and punched it out with the new small tag punch. Then I punched the regular tag out of regal rose. The horizontal slot punch makes a nice little opening for the taken with teal tab made from the word window punch out. The pretty in pink brad helps tie the whole color scheme together.

This is my favorite layout to showcase tags. I've used it before for this birthday card and originally CASEd it from Jen McCracken whose original card I can't find online anymore but was CASEd here on splitcoast.

Stamps: Tagger's Dozen
Ink: Regal Rose, Cool Caribbean
Cardstock:
Close to Cocoa, Regal Rose, Cool Caribbean, Taken with Teal, Whisper White, Loves Me Designer Paper
Accessories: White Grosgrain Ribbon, Soft Subtles Brads, Small Tag Punch, Tag Punch, Word Window Punch, Horizontal Slot Punch

Monday, November 27, 2006

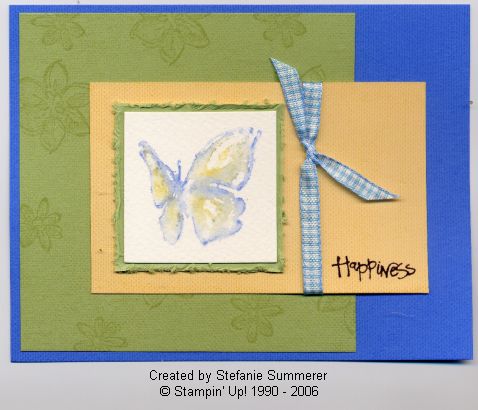
Happiness is...


I love butterflies. I think I might own all of the butterfly stamps in the Stampin' Up! catalog. So, when I got my Winter mini catalog in the mail and saw the Butterflies of Happiness set, I had to add it to my first order.

To get a soft watercolored look, I colored directly on the butterfly stamp with my watercolor wonder crayons. Then I sprayed the watercolor paper with water and stamped. This is my favorite way to use the watercolor wonder crayons.

Every layer of this card was stamped with the linen background stamp to soften it a little. I also used the cutter kit to rough up the layer behind the butterfly. I think this adds a whispy and airy element that looked perfect. To just stamp the word "Happiness", I inked up the single word with my basic black marker.

The layout is from sketch challenge 86 at splitcoast stampers.

Stamps: Butterfly of Happiness, Linen Background Stamp
Ink: Ballet Blue, Certainly Celery, Barely Banana
Markers: Basic Black
Cardstock:
Ballet Blue, Certainly Celery, Barely Banana, Watercolor Paper
Accessories: Light Blue Gingham Ribbon, Watercolor Wonder Crayons, Snail Adhesive, Cutter Kit

Sunday, November 26, 2006

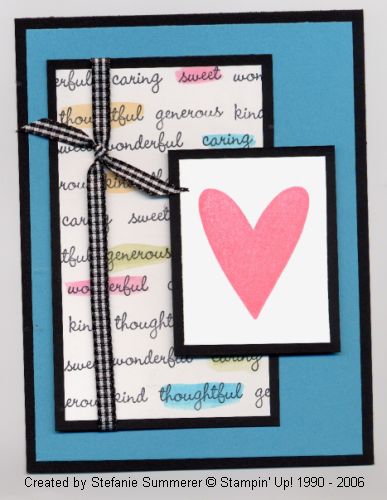
It's a Good Thing!


The name of this stamp set cracks me up. It makes me think of Martha Stewart saying "It's a good thing."

Anyway, the simply sent kit that I ordered arrived on Wednesday as I was in the middle of Thanksgiving pie making. It's been a busy couple of days, but I finally had the chance to open the box and play today. Let me tell you, I am loving these kits. I have a funny feeling I will be ordering at least one more of them during Sell-a-Bration. I haven't made the cards that came in the kit yet, but popping out the die cut rubber was like heaven. It was so easy to mount the stamps since I didn't have to trim the rubber myself.

I have a winter mini swap due with a wonderful group of demonstrators and I was determined to use my new kit (or at least the stamp set from it). I wasn't feeling the earth element colors today though, so I decided to try something different.

This is my favorite color combination from the Color Coach. (Best tool ever!!) Whenever I get really stuck, I just give the wheel a spin and see what comes up.

I used the word stamp from the Good Things stamp set to stamp the 6 words over and over again on the whisper white cardstock in Stazon Jet Black ink. I used Stazon instead of Basic Black to ensure that it wouldn't bleed on my markers later. To make sure everything lined up correctly, I used my Stamp-a-majig. (Second best tool ever!!) Then with markers, I highlighted some of the words to make them stand out more. I saw something similar in a Hero Arts catalog a few years ago and I guess the idea just stuck with me. The layer with the heart is popped up with a dimensional to help complete the look.

Finally, the layout is from sketch challenge number 68 over at splitcoast stampers. I wish I made time to do the challenges every week, but I usually don't. However, I do go back and use old challenges quite often. I think they are a wonderful resource to get your creative juices flowing. This layout in particular is one of my favorites.

Stamps: Good Things Simply Sent Kit
Ink: Stazon Jet Black, Cameo Coral
Markers: Apricot Appeal, Cameo Coral, Certainly Celery, Tempting Turquoise
Cardstock: Tempting Turquoise, Whisper White, Basic Black
Accessories: Black Gingham Ribbon, Stampin' Dimensionals, Snail Adhesive